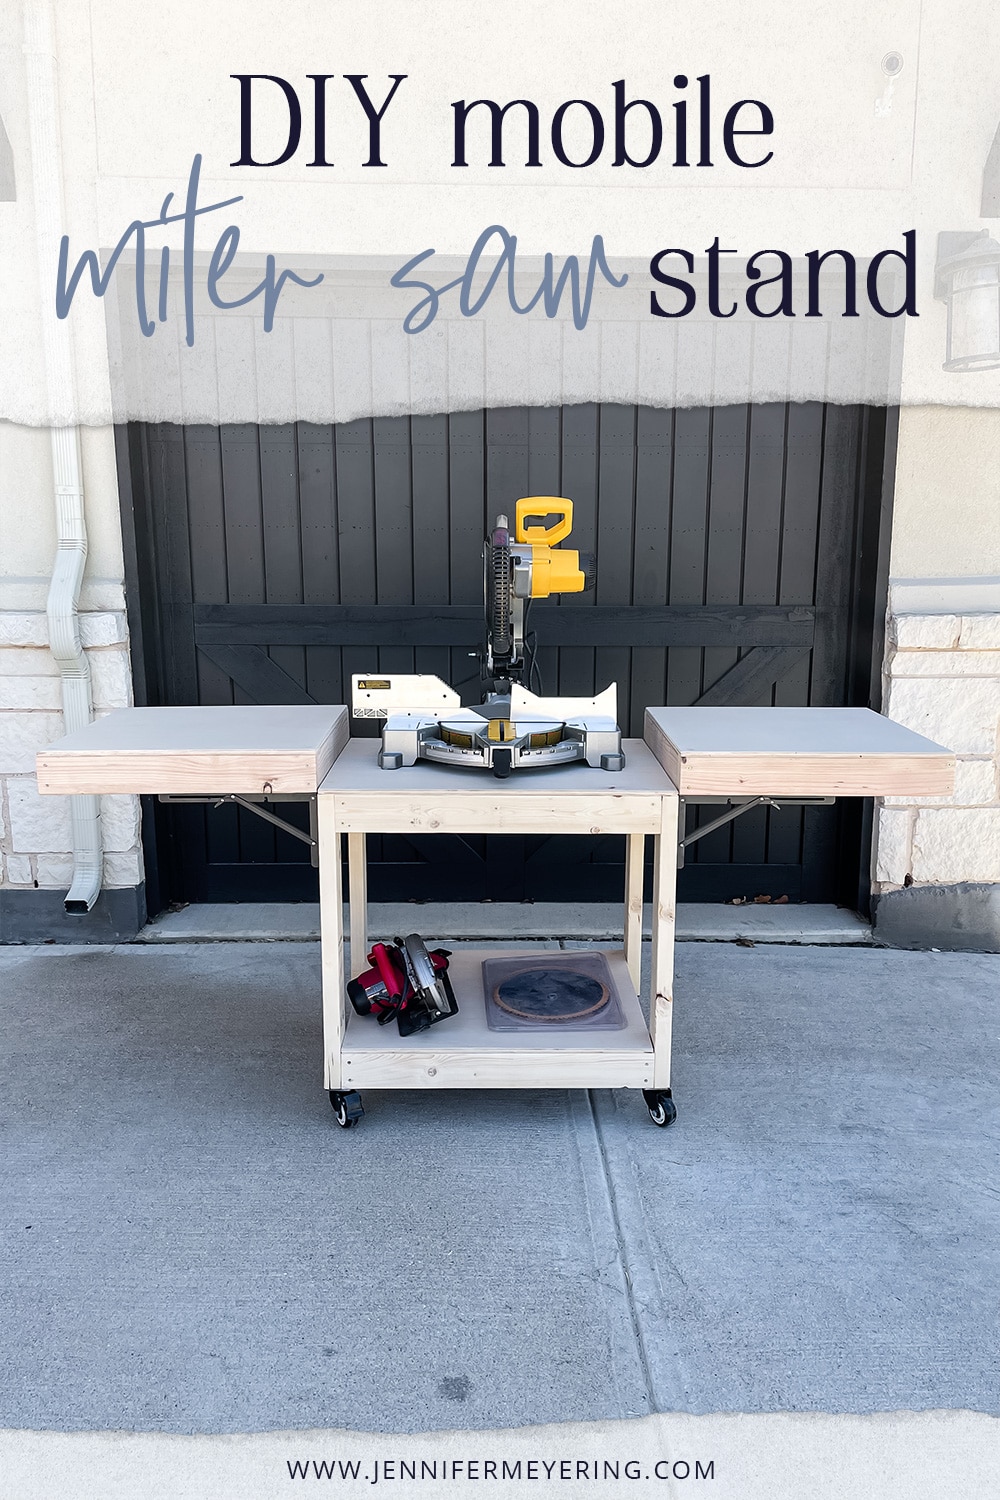
Remember that stack of lumber I shared a while back, promising big things for this year? Well, buckle up because the first big project is here, and it’s a game-changer: my very own mobile miter saw table with foldable wings!
Yes, you read that right. Foldable! This ingenious feature not only provides a perfectly level surface for cutting lumber but also allows me to fold down the wings when not in use, saving precious space in my workshop. Talk about double the win!
Now, I know what you’re thinking: “Foldable sounds complicated!” But trust me, it’s surprisingly easy to add this feature to your own mobile miter saw table. Let me tell you, having a mobile miter saw table has been a game-changer for my projects.
Having a dedicated, stable platform for my miter saw has made everything so much easier, not to mention safer.

Why You Need This Project in Your Life:
If you’re anything like me, you’ve probably used a miter saw on a rickety sawhorse or workbench or broken your back bending up and down because it’s on the floor of your garage more times than you care to admit. It’s not ideal, is it?
A dedicated miter saw table is like a dream come true. It gives you:
- Stability: No more wobbly cuts, just smooth, precise results.
- Convenience: Everything you need within reach, making your workflow a breeze.
- Control: Perfect angles and consistent cuts every time.
- Portability: Wheel it around your workspace wherever you need it.
Plus, building it yourself is a rewarding experience that teaches you new skills and gives you a sense of accomplishment. You’ll be amazed at what you can create with a little bit of time and effort (and maybe a few trips to the hardware store)!
More Outdoor DIY Projects


So, if you’re like me and have a long list of DIY projects on your horizon, I highly recommend building your own mobile miter saw table. It’s a surprisingly straightforward project that doesn’t require advanced woodworking skills. Plus, the benefits are totally worth it!
What You’ll Need:
- Plywood or MDF (for the top and base)
- 2×4 lumber (for the frame)
- Casters
- Folding shelf brackets (for the wings)
- Wood glue
- Sandpaper
- Paint or stain (optional)
- Safety glasses, gloves, and ear protection
Tip: You can easily find different plans and material lists online for free based on the design you want. I followed the plans from BitterrootDIY and highly recommend them!
- Tools: saw, drill, sander, tape measure, square, etc.
My Favorite DIY Tools


Step 1: Plan Your Build
Before you grab your saw and hammer, it’s important to plan your build. This includes:
- Deciding on the size of your table: Think about the size of your miter saw and the types of projects you’ll be using it for.
- Choosing the right materials: Plywood and MDF are popular options for the top and base, but you can also use solid wood if you prefer. I used a 3/4″ sande plywood for my top, bottom, and wings.
- Planning the layout: Sketch out a design that includes the placement of your miter saw, outfeed table, and any other features you want to add.

Step 2: Cut Your Materials
Once you have your plan, it’s time to cut your materials to size. 🪚 I recommend using your miter saw for the 2x4s and a track saw for the plywood or MDF.
Tip: Wear safety glasses and gloves whenever you’re using power tools.


Step 3: Assemble the Frame
Now comes the fun part: assembling the frame! Use wood glue and screws to connect the 2×4 lumber together. This is the foundation of your table, so make sure it’s sturdy and square.

Step 4: Build and Attach the Wings
- Cut out two pieces of plywood or MDF for the wings, ensuring they match the height and depth of your table top.
- Install brackets on the frame to support the wings when folding and unfolding.
Tip: Test the folding functionality to ensure smooth operation and adjust as needed.

Step 5: Attach the Top and Base
Once the frame is assembled, it’s time to attach the top and base. You can use wood glue and screws for this step.

Step 6: Add the Casters
Now it’s time to make your table mobile! Attach the casters to the bottom of the frame according to the manufacturer’s instructions.


Step 7: Install the Miter Saw
This step will vary depending on your specific miter saw model. Consult your owner’s manual for instructions on how to mount it to the table.

Step 8: Finish and Customize
Now it’s time to add your personal touch! You can paint or stain your table to match your workshop décor, add an outfeed table, or even build storage compartments for your tools and accessories.
- Change the size: Make it bigger or smaller depending on your workspace.Add storage: Incorporate drawers, shelves, or bins to keep your tools and materials organized.Install a dust collection system: This will keep your workspace clean and improve your air quality.Paint or stain it: Give your table a personalized touch with your favorite color or finish.


Conclusion:
Building my own mobile miter saw table has been a fantastic experience. It’s saved me time, improved the accuracy of my cuts, and made working on projects so much more enjoyable. I can’t recommend it enough!
So, what are you waiting for? Grab your tools, pick up some lumber, and start building your own mobile miter saw table today! You won’t regret it.

Note: These instructions provide a general guideline for building a mobile miter saw table. Depending on your specific requirements and the tools/materials available to you, you may need to make adjustments or modifications during the construction process.


