When I started food blogging, I had no idea what I was doing. I just started posting recipes and things that I loved and it blossomed from there. I mean, this little blog of mine started as a health & fitness blog for my Team Beachbody business… what authority did I have to begin posting about the food that I love?? But after a while, I realized that I enjoyed blogging about food more than fitness and health and the content started flowing more naturally and I just fell in love with blogging – whereas before it felt like more of a chore and not very fun.
For those wondering: Yes, I am still a Beachbody Coach and run challenge groups and help people achieve fitness goals but that is not the primary focus of this blog anymore, even though I do still post the monthly fitness and nutrition tips here.
So when I realized that I loved this little food blogging thing, I set out to find out as much information about food blogging and photography that I could and with a ton of practice I have turned my ugly initial food photos into something that is much more appealing and beautiful to look at. Wouldn’t you rather look at a food photograph that makes you want to eat it than one that is just blah or mediocre? Of course you would! And after learning more about food blogging and photography, I knew that I could only get so far with the props and backgrounds that I currently had.
I’ve been looking everywhere for great food backgrounds with little luck. For a few months now, I’ve just been using a cheap foam board from Meijer and a large cutting board from Ikea and have been feeling like my photos are all beginning to look the same and get a little boring. I need to spice things up!
So I decided, instead of trying to find what I wanted, why not just make it with things from the hardware store? Ding ding ding! So I went to my local Lowe’s and did some digging in the wood and paint sections. I picked up some cheap wainscoting and sample paint colors to make some beautiful backgrounds that are sure to make my food photos pop. Actually they already have… see this post and this post.
So why not share what I did with you??
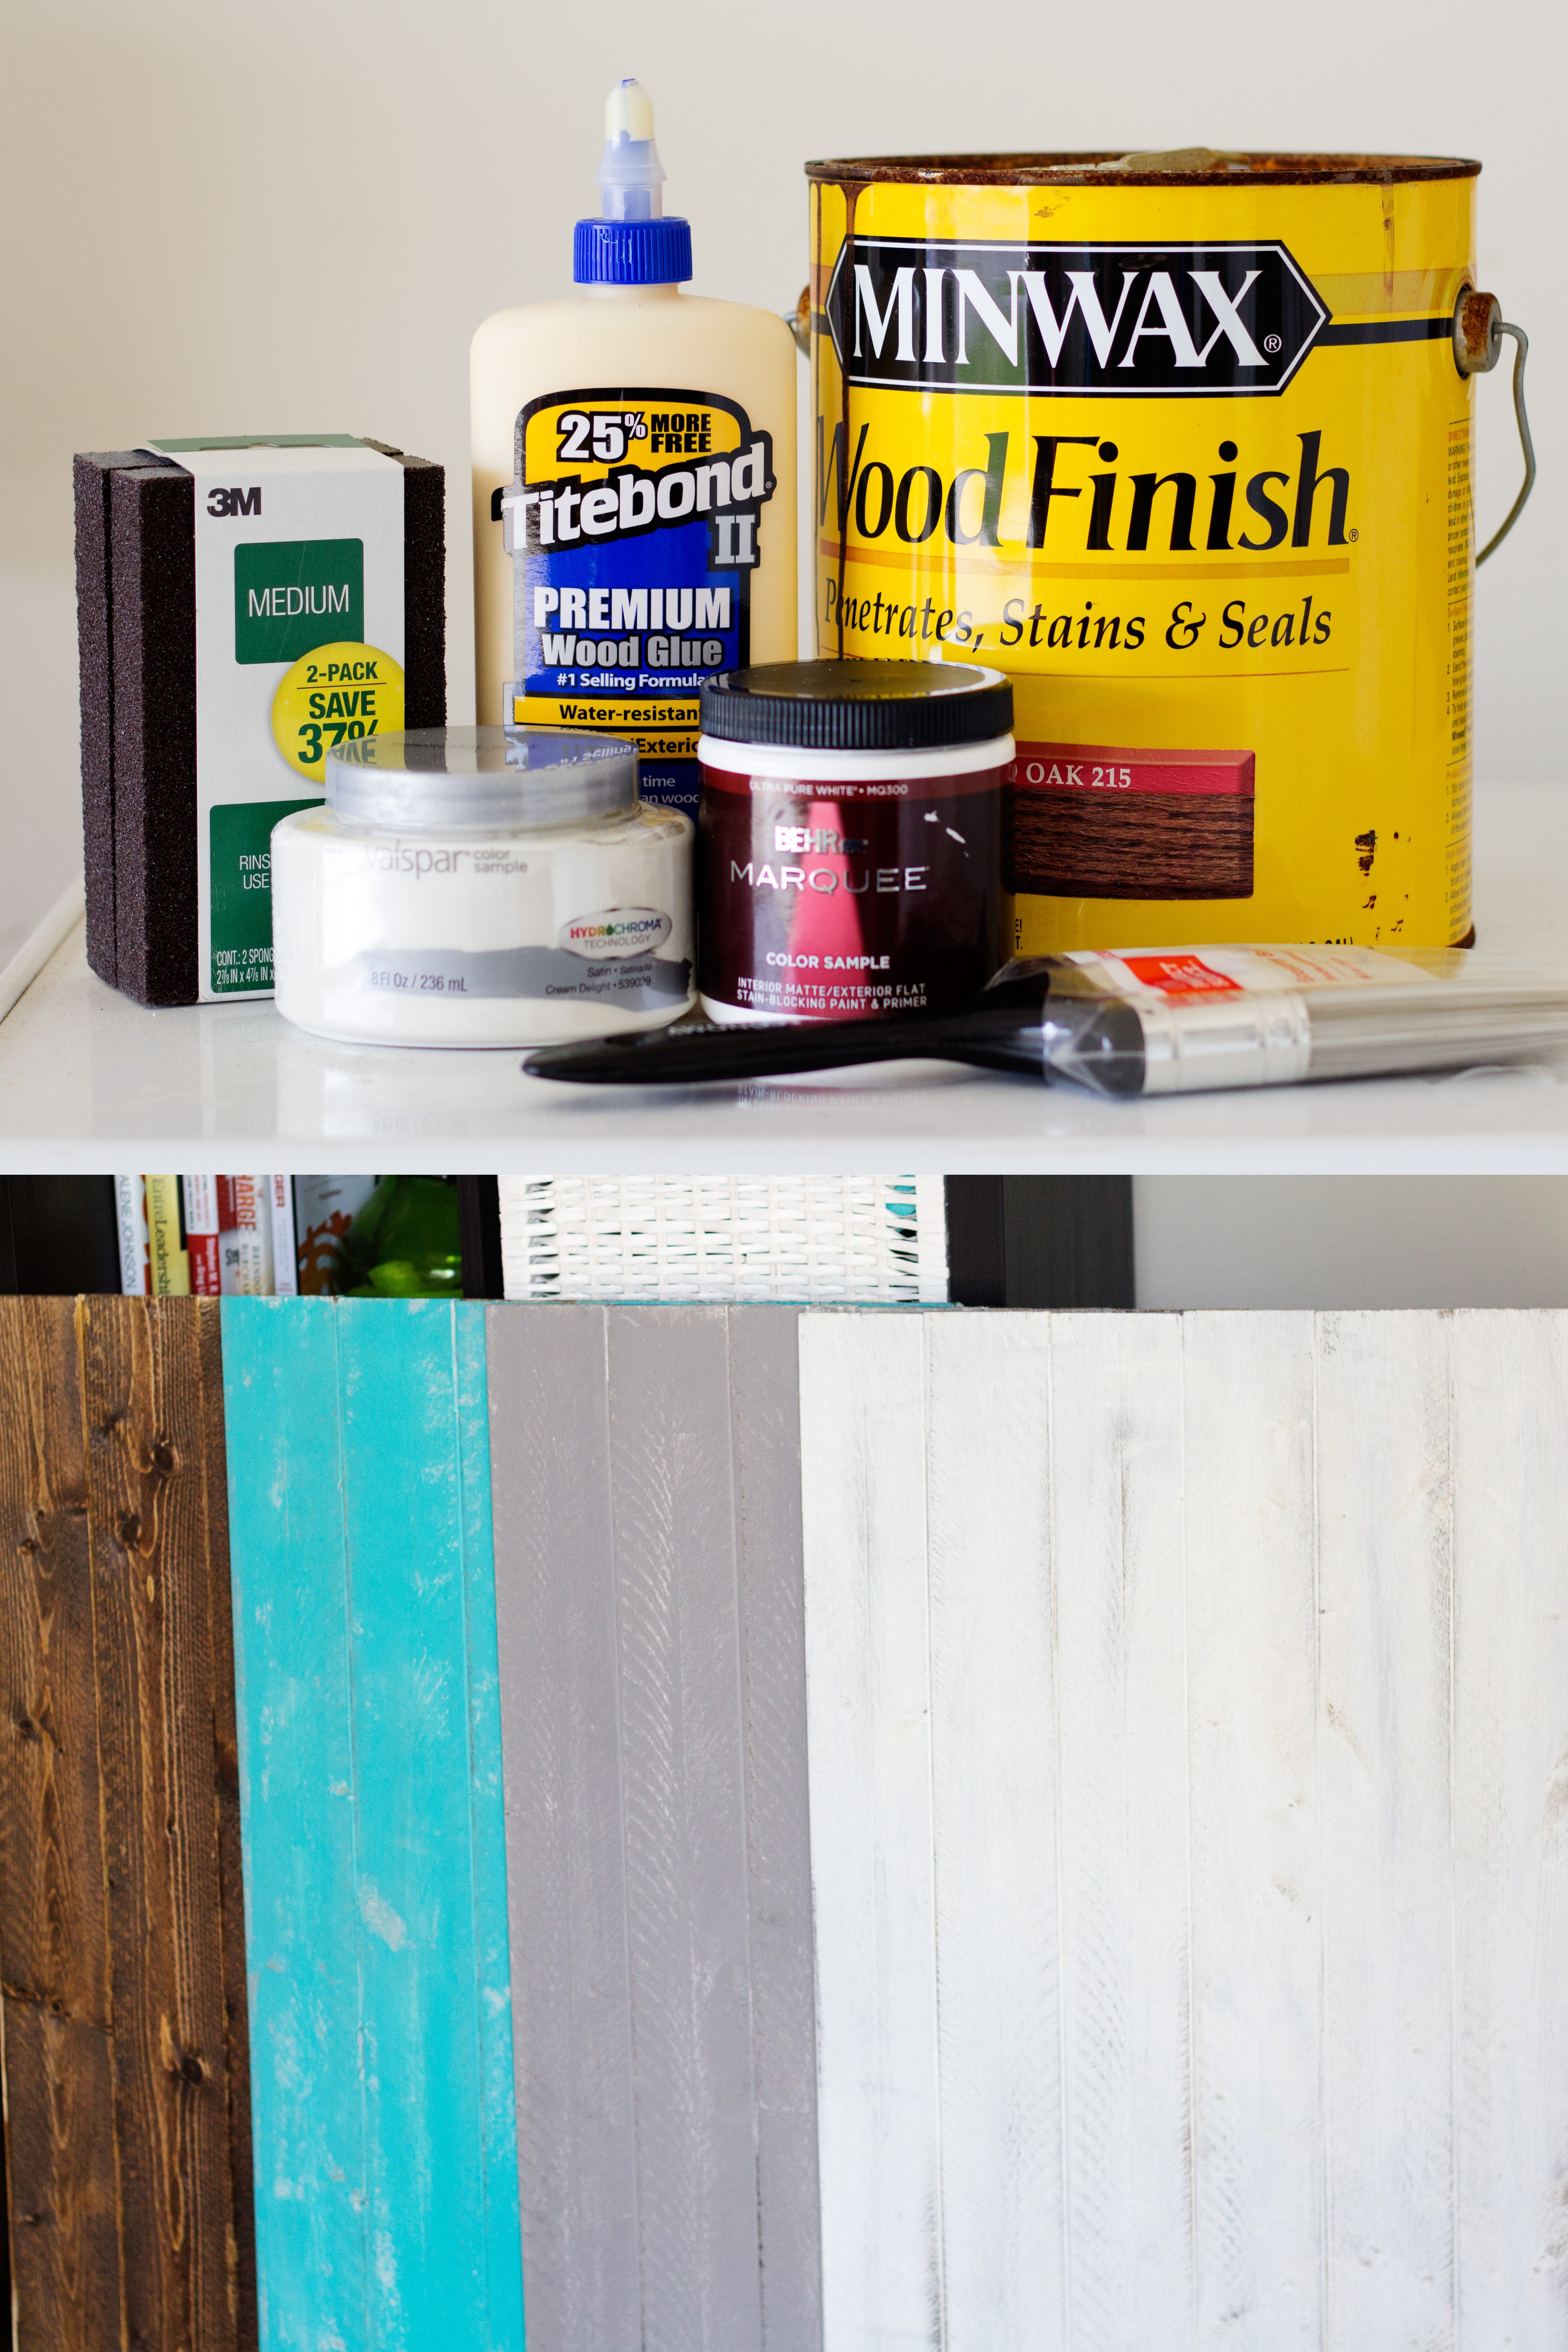
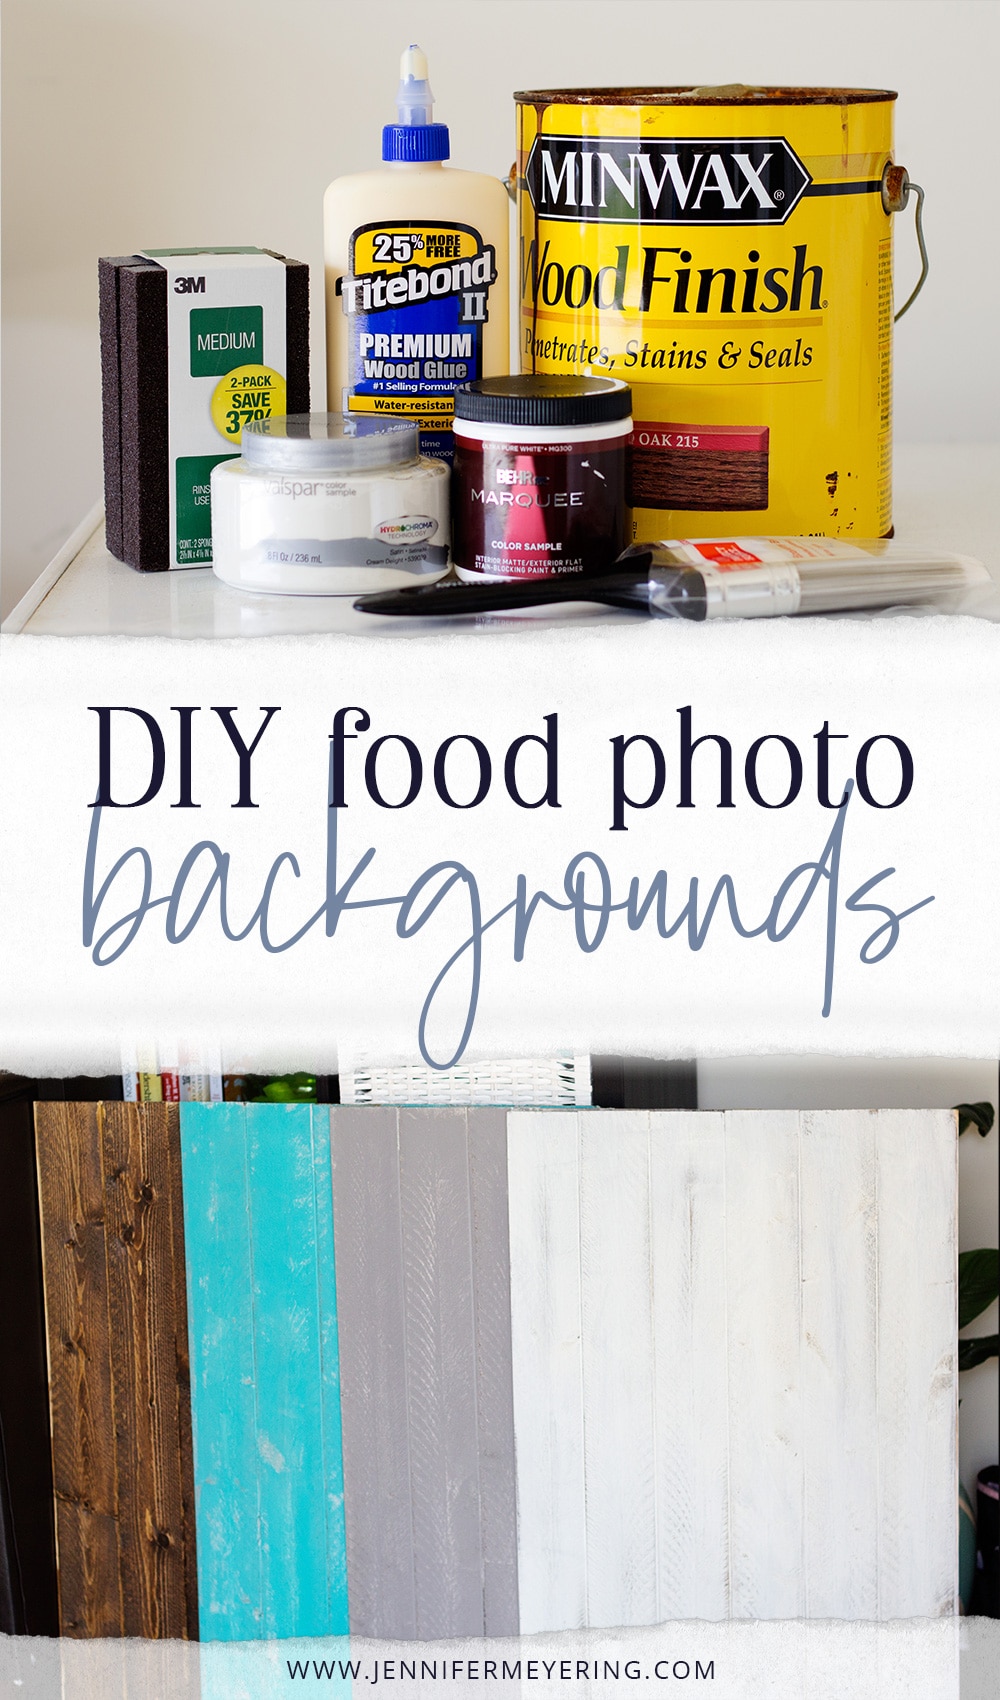
Supplies:
- 1 pack of plank paneling or wainscoting, 36″ long
- Wood glue
- Paint samples – White and color of your choice (I used a dark grey and turquoise)
- Wood stain sample
- Paintbrush
- Sandpaper – optional for more distressed look


When I went to look for the background, I was looking for something smooth and not so many ridges. Unfortunately, the Lowe’s that is here only has the edge and center board that makes it look like beadboard when you put it together. Instead of traveling an hour to go find what I wanted, I noticed that the back of the edge and center board was smooth and I could still use the back of it to get the effect that I wanted.
However, if you can find the regular wainscoting and not the edge and center, then get that instead. Unless you want the look of an edge and center board.
The package of wainscoting comes with 12 planks, enough for you to make 2 backgrounds with. I purchased two packs so I could make 4 different backgrounds. For the colors, I picked up a regular white, a custom turquoise, and dark grey (not shown).
Also, this project does take a few days to complete because of drying time. It took me a total of 3 days because I wanted to make sure that everything was thoroughly dried in between each step and coat of paint/stain. I’m sure you might be able to finish it sooner, but I didn’t want to risk it.

Step 1:
Unpack the boards and apply glue into the groove of one board and then push the tongue into the groove. Repeat until you have used 6 boards, then start again with the second set of 6 boards. Let them dry for at least 12 hours.

Step 2:
After the glue has thoroughly dried, you can begin staining the boards. Start with a very light coat of stain and then add more coats to get the desired color you want. The more stain, the darker it will be. Alternatively, you can also quickly wipe some of it off to have the unfinished boards show through.
Repeat this process with both or all of your glued boards and let dry for at least 12 hours.

After the stain has thoroughly dried, you may begin applying your coats of paint. For more of a whitewashed look, mix a ratio of 50/50 paint and water. This will make more of the stain show through and look a little more distressed. If you don’t want a distressed look, you can skip mixing the paint with water and just paint directly on the stained boards or mix the paint but just apply more than one coat.
Step 3:
Let the paint dry overnight or for about 12 hours.
After the paint has dried you can go back with sandpaper and distress the wood even more by sanding in random areas on the boards.


Finished backgrounds:
I left one board with just the stain because I love how it turned out with the roughness of the surface and different shades of brown. I made 4 boards in total: one just stained, one white, one grey, and one turquoise.
The grey one I stained, then painted white, then painted grey. I wanted a little more dimension like it would have been an old door or something that had been painted a few times.
I love how they all turned out!

After trying them out on a few photos, I am so happy with the result and how they look. I’ve only used two of the boards so far but I cannot wait to use the other two and see how they look.
Cost Breakdown:
- 1 pack of wainscoting – $10.79
- Wood glue – $3.98
- Paint samples – $3.48 each
- Wood stain sample – $3.48
- Paintbrush – $0.99
Total Cost:
- $22.72 for 2 boards
- $40.47 for 4 boards


